In a previous blog post, we have learned how to setup a simple access control, which has a fixed value set. This is cool for demo cases, but it is of course not usable for productive systems. In the old SAP GUI, we have used authorization objects and fields in combination with AUTHORIZATION-CHECK in our ABAP reports to check for permissions. In BTP and our ABAP environment, we can do this in an equivalent way.
Prerequisites
We first need at least a data element in a database table, which we later want to filter depending on our authorization.
In this tutorial, we do this with a country code. We want that only users in a certain region can view and set an airport for a connection.

We want to build a role, where we just can see the airports, which are in Europe. That means that we only see 5 airports instead of 6 now.
Our database table, which will be used by our CDS view ZVALUEHELP_AIRPORTS, looks as follow:
@EndUserText.label : 'Airports table'
@AbapCatalog.enhancement.category : #NOT_EXTENSIBLE
@AbapCatalog.tableCategory : #TRANSPARENT
@AbapCatalog.deliveryClass : #A
@AbapCatalog.dataMaintenance : #RESTRICTED
define table zairports {

  key client     : abap.clnt not null;
  key airport_id : zairp_id not null;
  name           : abap.string(0);
  city           : abap.string(0);
  country_code   : zcouc;

}
Authorization field and object
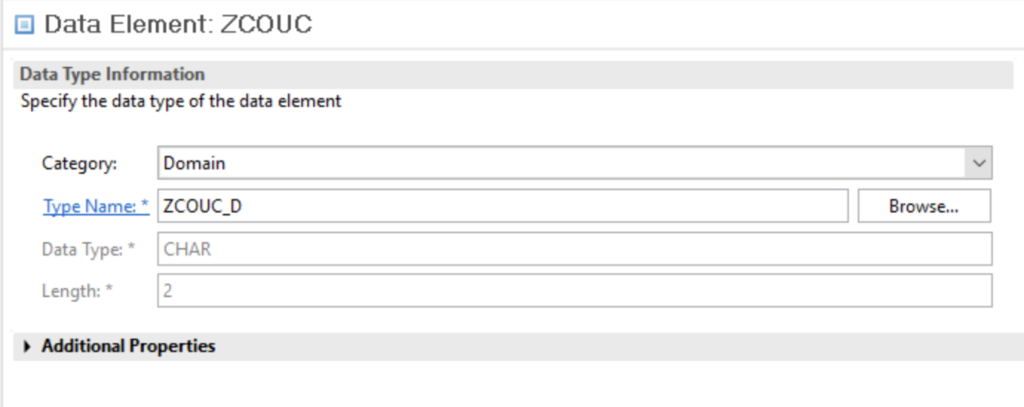
For that, we create first an authorization field in Eclipse. For that we refer to our data element, which we have created previously:

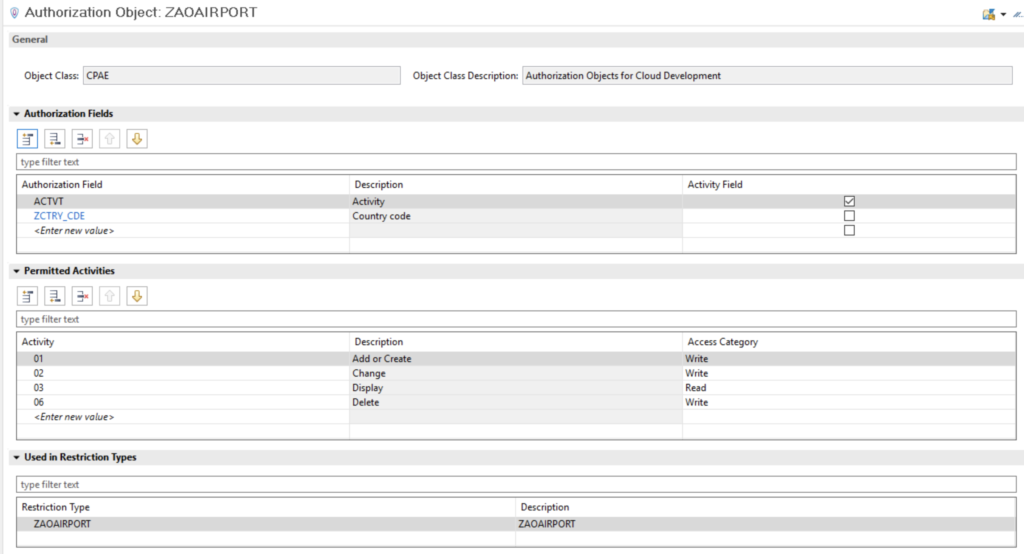
Then we are able to create our authorization object and associate the field to it.
IAM setup
Now that we have these objects, we have to create the IAM setup. This will be used to manage the roles and business catalogs later over the Web Access for ABAP.
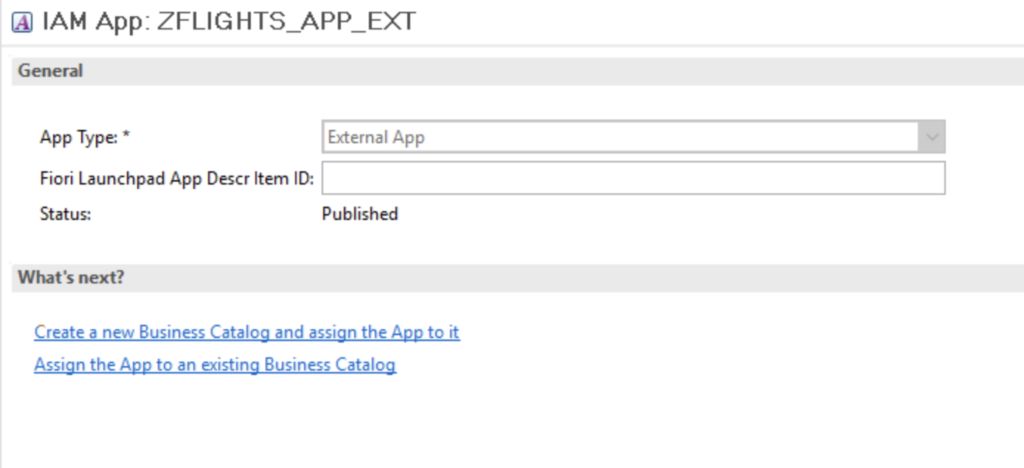
We need a new external app, which will also be published:
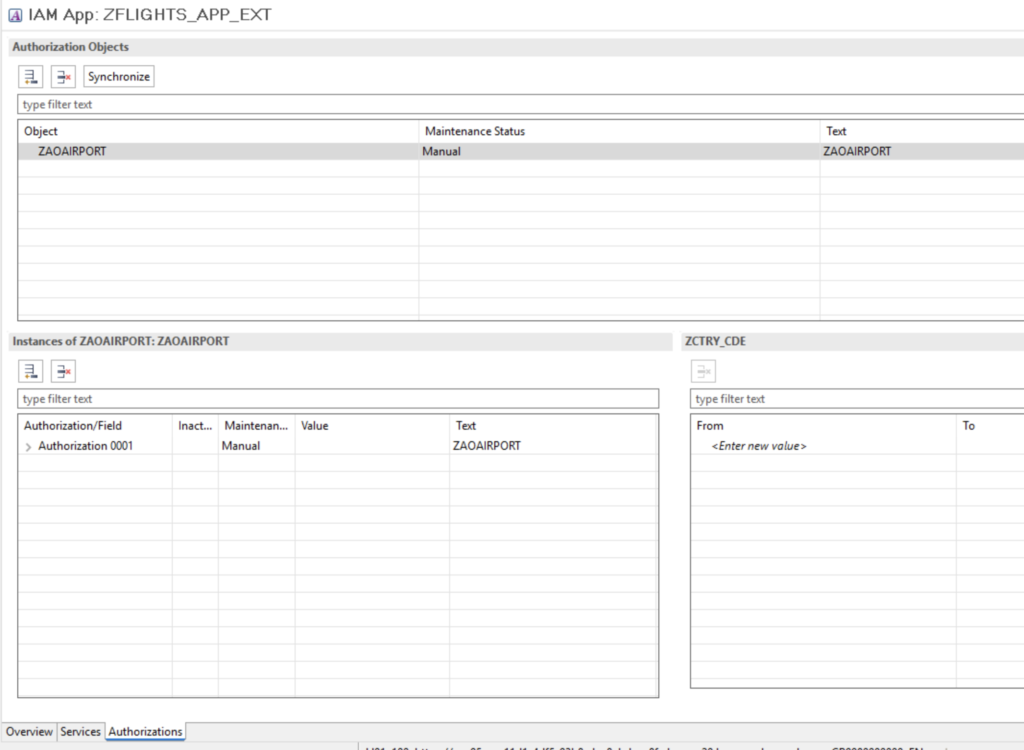
From this external app, we can select below the tab “Authorizations” to choose our ZAOAIRPORT authorization object and assign it to it. We could also define here already the acceptable values, which can be viewed later like DE, CH, etc. We do this in a later step in our role definition in the Web access, so that we can handle this role based and not application based.
Business catalog
When we have created our IAM app, we can now follow the “What’s next?” section, where we can create a business catalog for our created app:

Restriction types and fields
Now that we have assigned the business catalog with the app, we now have also to define the restriction types and fields which are the equalient for authorization objects and fields. With restriction types and fields, we publish the ability to assign restrictions to our roles later.
First we create the field for our authorization field.
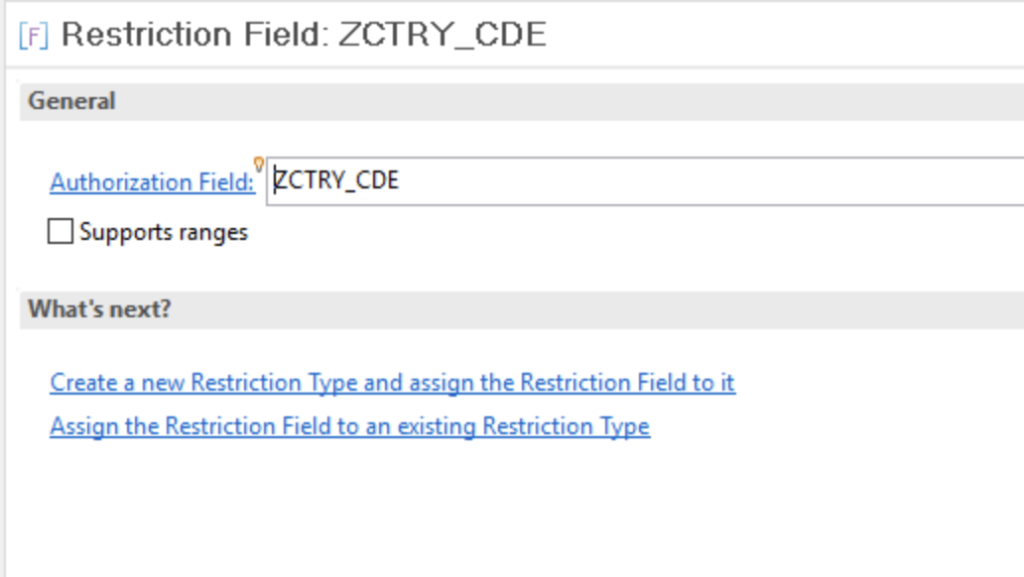
After that we can immediately create the restriction type, where we enter the name of the authorization object.
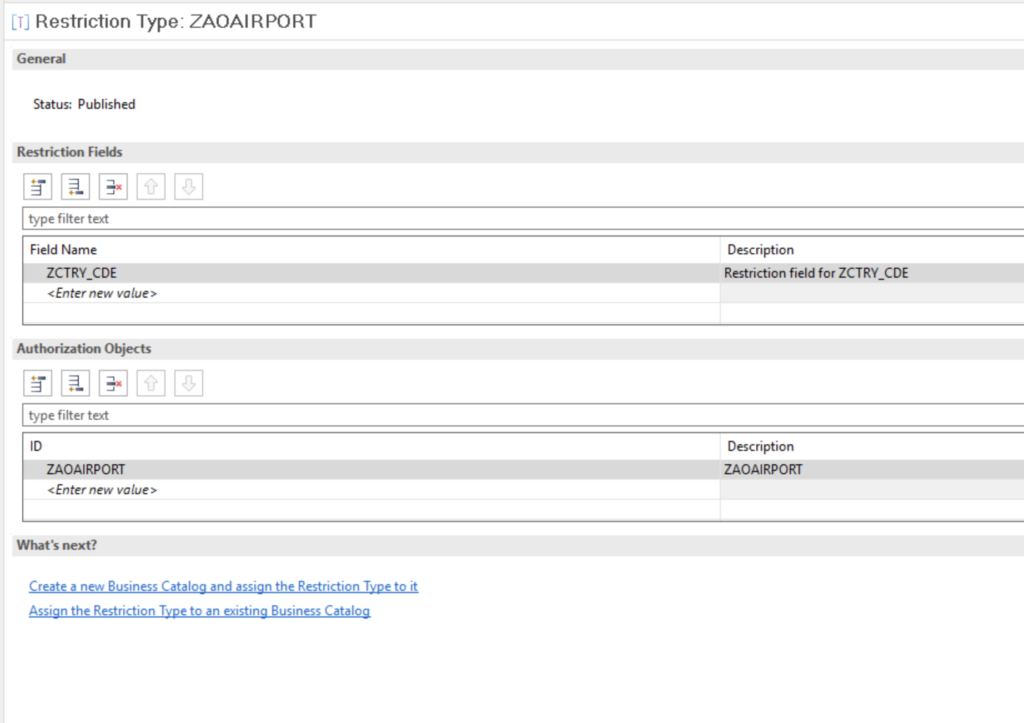
Finally, we assign the restriction type again to our business catalog in the third tab:
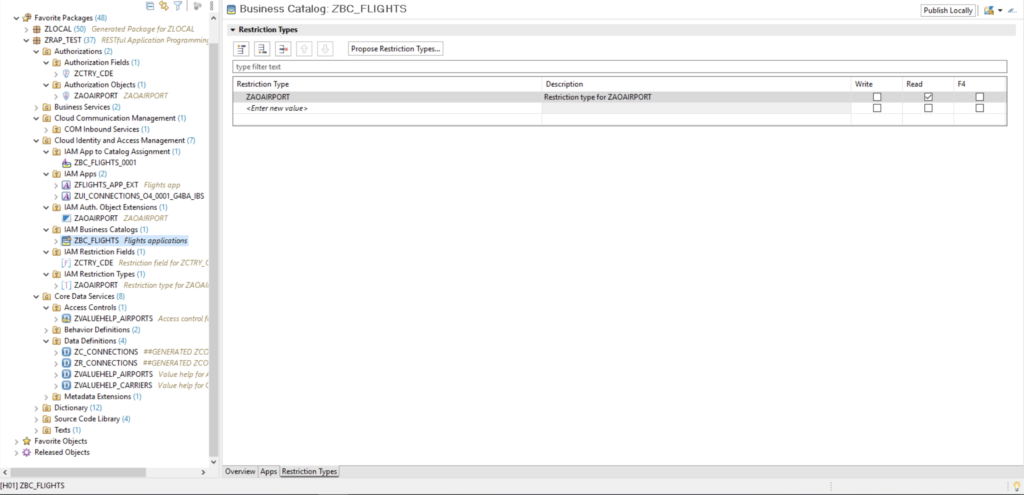
BTP “Web access for ABAP”
In our BTP, we select the application “Web access for ABAP” to now manage our roles, business catalogs and permissions for the users.

When we open this, we get a Fiori Launchpad, where we then can choose “Identity and Access Management” from the menu:
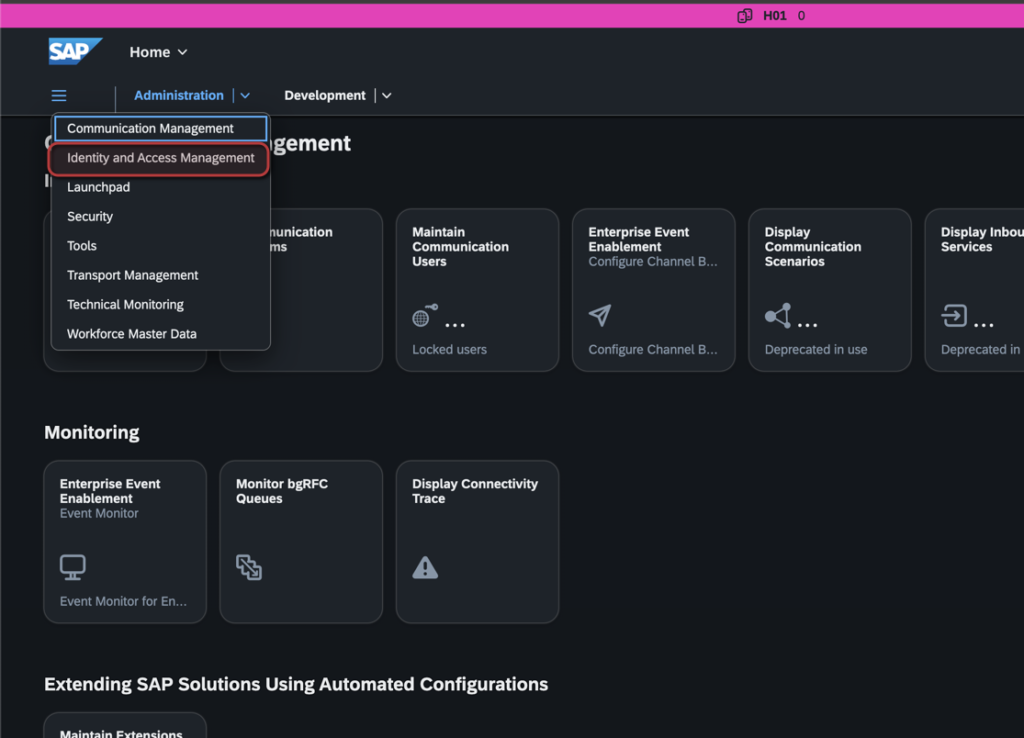
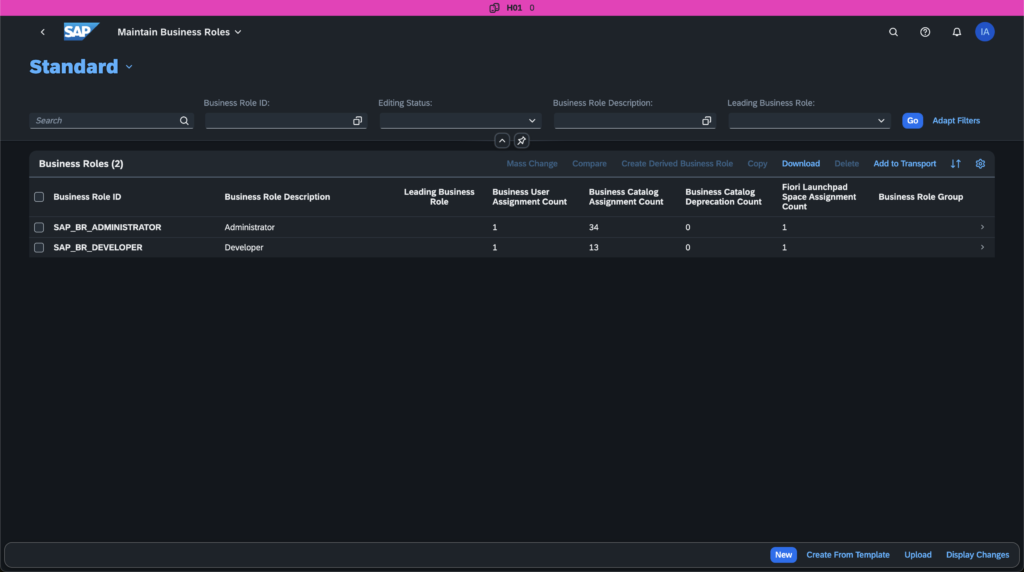
You can now manage inside
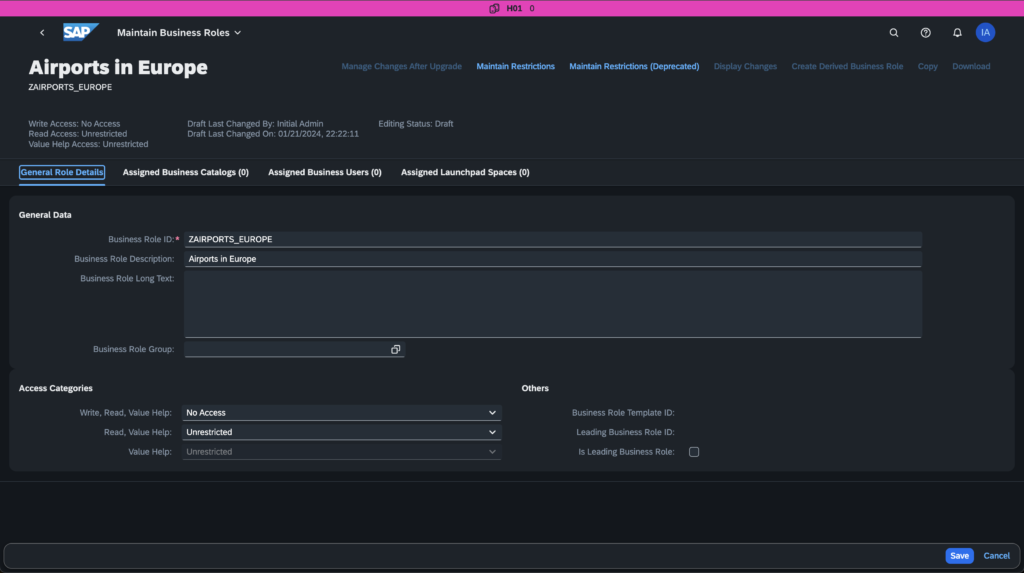
Now we create a role with a name, that does desribe this role for a user or what exactly it enables for the user. In our case, it will show all airports in Europe:
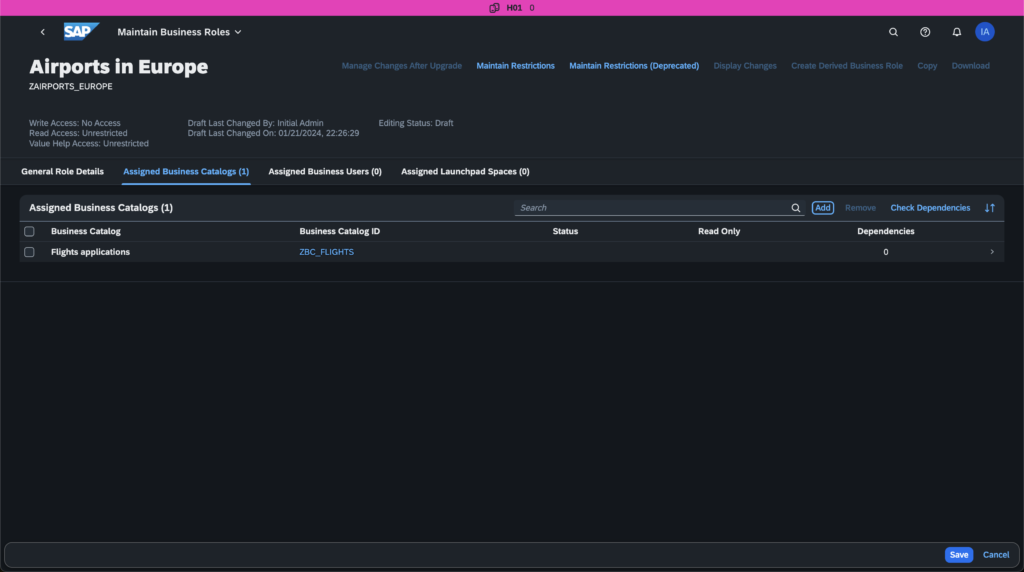
Then we can assign our newly created business catalog to this role as well as the users, that should be assigned to this role.
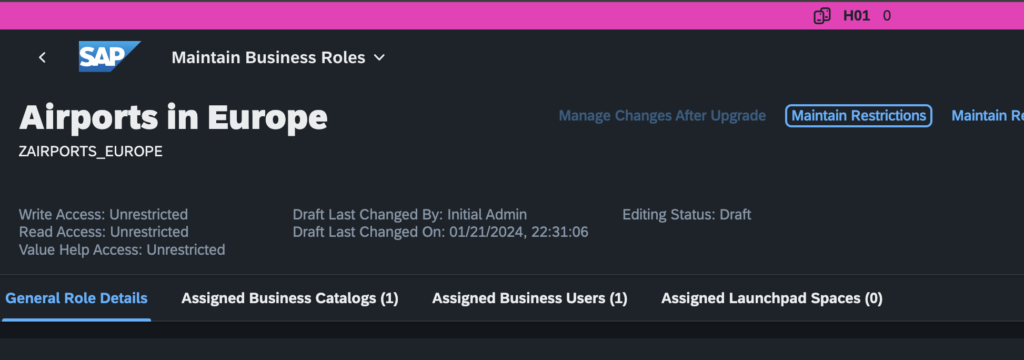
After you have assigned them, we are now able to maintain the restrictions for this role and with that the selection of the authorization object.
Here select on the left side, that you want to restrict the access to the authorization object with additional values. By default, it was selected “Unrestricted”.
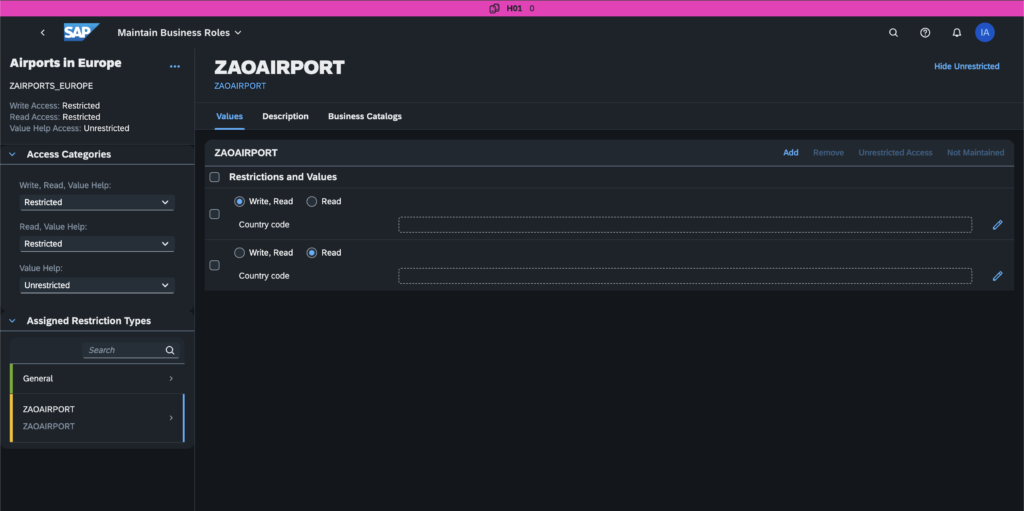
From there you can click the edit button, to assign the values, which could be read later from the CDS view.
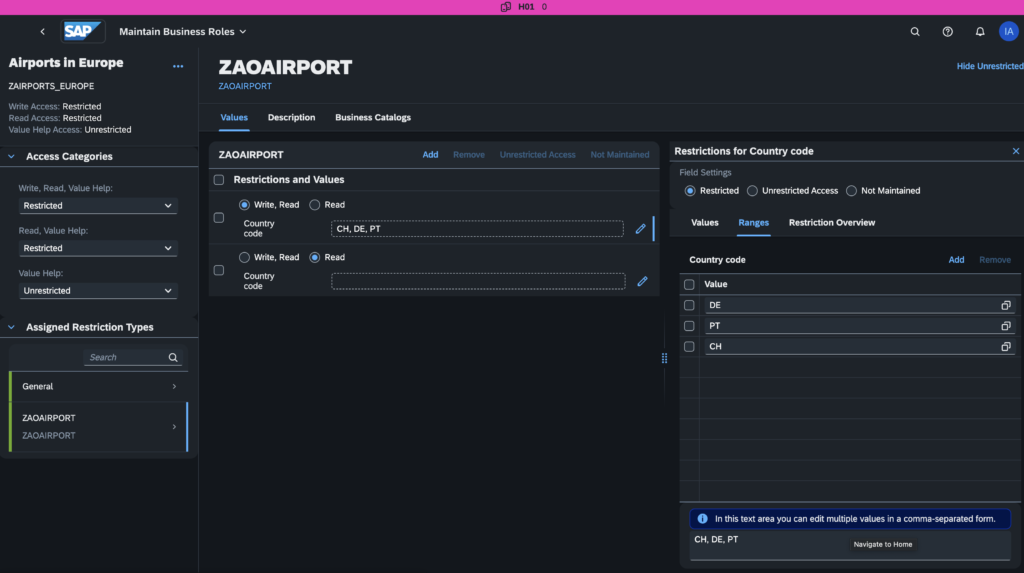
Don’t forget to save all the data and then go back to your Eclipse environment. There we can now use the PFCG object, which validates the permissions
CDS Access control
Now the CDS access control can be defined with an PFCG aspect as defined below:
@EndUserText.label: 'AC for the ZVALUEHELP_AIRPORTS'
@MappingRole: true
define role ZVALUEHELP_AIRPORTS_AC {
    grant
        select
            on
                ZVALUEHELP_AIRPORTS
                    where
                        ( CountryCode ) = aspect pfcg_auth( ZAOAIRPORT, ZCTRY_CDE, ACTVT = '03' );

}
To show case it more with the given role and the assignment, which we took, we would get the following WHERE selection:
@EndUserText.label: 'AC for the ZVALUEHELP_AIRPORTS'
@MappingRole: true
define role ZVALUEHELP_AIRPORTS_AC {
    grant
        select
            on
                ZVALUEHELP_AIRPORTS
                    where
                        CountryCode = 'DE' OR CountryCode = 'PT' OR CountryCode = 'CH'

}
Result
As the result, we can now show the data output of our CDS view:


Leave a Reply