
To monetize your iOS application, you can use a various of services like Google AdMob or Meta’s Audience Network. In this tutorial, I want to quickly show you how to setup the Google AdMob SDK into your SwiftUI application.
Prerequisites
- Xcode
- An existing SwiftUI application
Make sure also that you already have included the SDK via pod or Swift Package Manager. I have done it directly with the SPM, where you just have to include the URL:
https://github.com/googleads/swift-package-manager-google-mobile-ads.git
For more details about how to include the SDK, follow the official documentation of Google.
https://developers.google.com/admob/ios/quick-start?hl=en
Setup
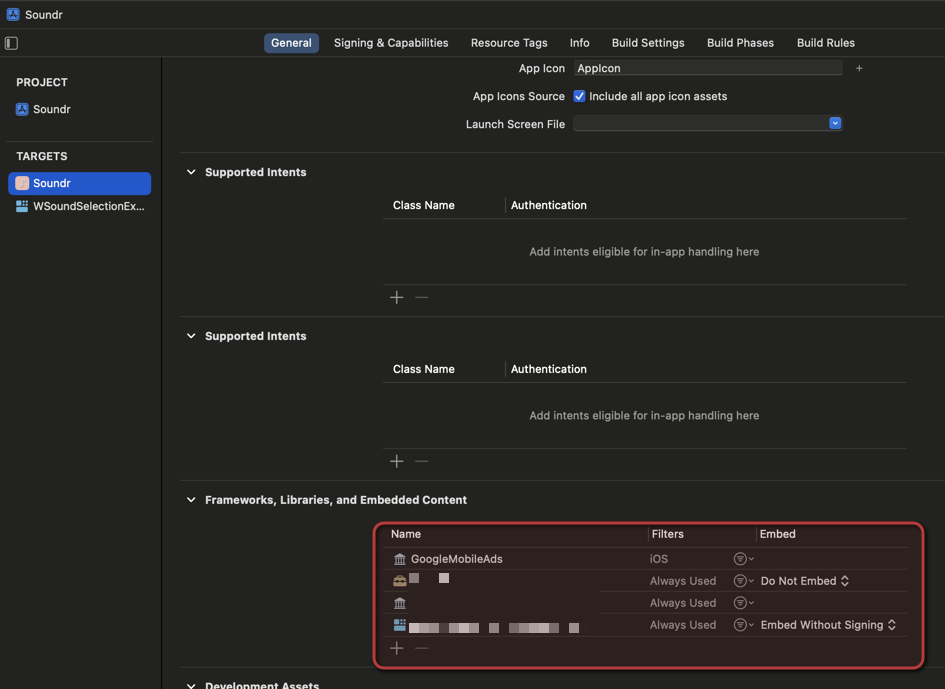
After you have included the SDK in your app, you have to assign the package also in the application settings.
Then you can initialize the SDK by calling the just the single line of code, like described in the quick start:
import Foundation
import UIKit

#if !targetEnvironment(macCatalyst)
  import GoogleMobileAds
#endif

class AppDelegate: UIResponder, UIApplicationDelegate {


    func application(_ application: UIApplication, didFinishLaunchingWithOptions launchOptions: [UIApplication.LaunchOptionsKey: Any]?) -> Bool {

        // ...

        #if !targetEnvironment(macCatalyst)
          // Google AdMob
          GADMobileAds.sharedInstance().start(completionHandler: nil)
        #endif

        return true
    }

    // ...

}
You may noticed, that I have placed the short code targetEnvironment(macCatalyst) to ensure, that if you also want to deploy your app for Mac using Mac Catalyst, you can’t use this SDK since it does not support desktops.
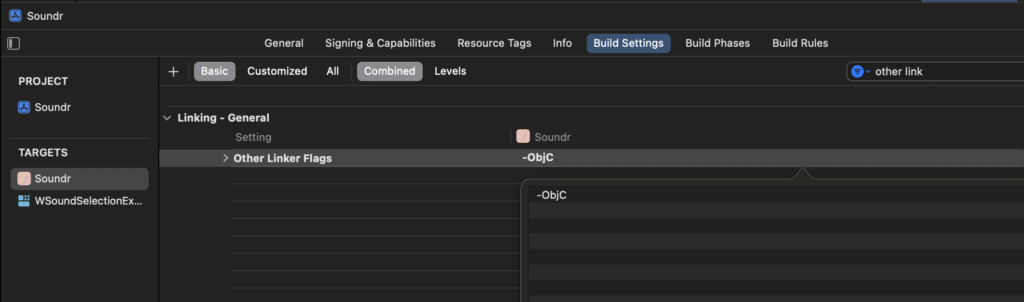
Also, if you face some issues like “The Google Mobile Ads SDK was initialized without AppMeasurement“, you may have to set the following flag in the build settings of your target.
The ad component
Now we are ready to place our ads in our application. First we need a SwiftUI component, since the official documentation only supports normal Swift code.
import SwiftUI
import GoogleMobileAds

struct AdMobBannerView: UIViewControllerRepresentable {

    private var adUnitId: String

    public init(adUnitId: String) {
        self.adUnitId = adUnitId
    }

    func makeUIViewController(context: Context) -> UIViewController {
        let view = GADBannerView(adSize: GADAdSizeBanner)

        let viewController = UIViewController()
        view.adUnitID = self.adUnitId
        view.rootViewController = viewController
        viewController.view.addSubview(view)
        viewController.view.frame = CGRect(origin: .zero, size: GADAdSizeBanner.size)

        view.load(GADRequest())

        return viewController
    }

    func updateUIViewController(_ uiViewController: UIViewController, context: Context) {}
}
After that we can now embed this component in our application. For example between a ScrollView:
import GoogleMobileAds

struct Home: View {

    // ...

    var body: some View {
        NavigationView {
            ScrollView {

              // ...

              AdMobBannerView(adUnitId: "ca-app-pub-XXXXX/XXX")
                .frame(width: GADAdSizeBanner.size.width, height: GADAdSizeBanner.size.height)
                .padding()

              //...

            }
        }
    }
}
Insert here in the parameter adUnitId your own ad unit id, which you can create in the AdMob app center.
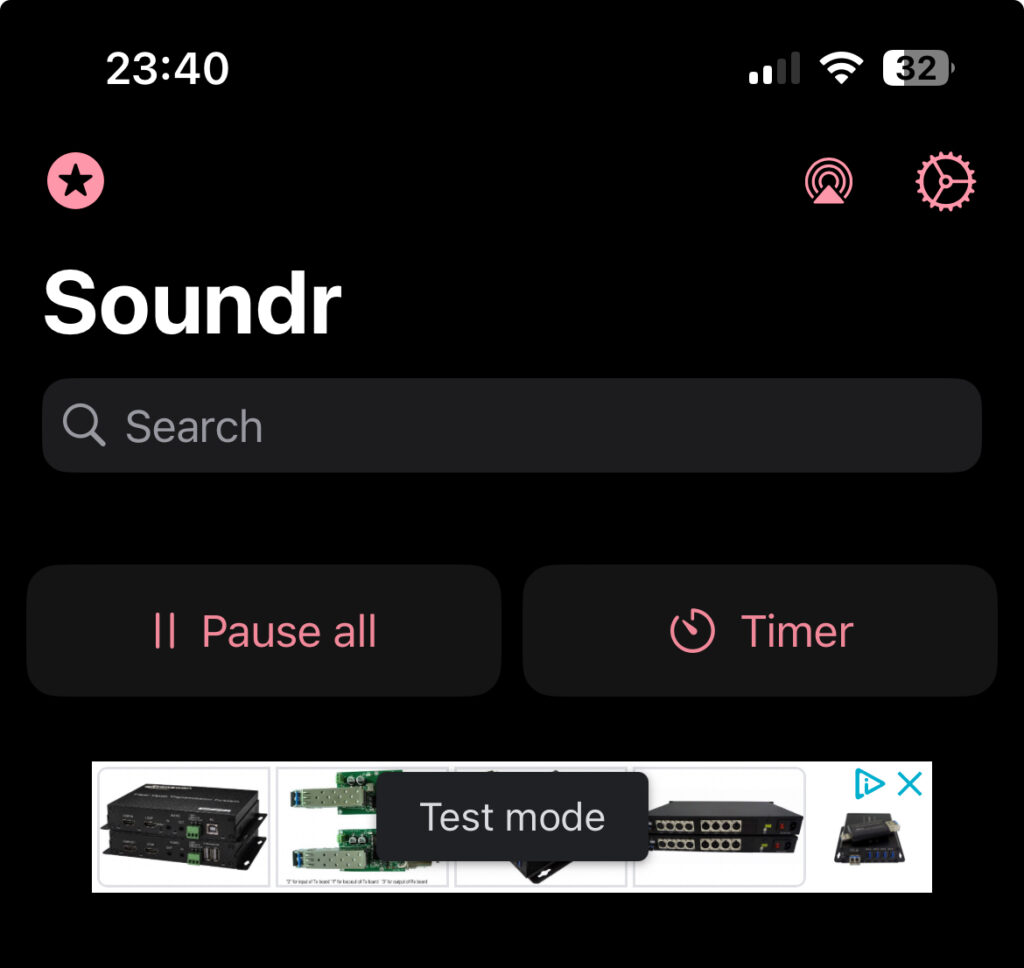
Now we can start our application an can see our AdMob banner in live:
Testing
According to the policies of Google AdMob, you are not allowed to click on you own ads. Therefore you can register your devices as described in the official Google docs.

Leave a Reply